Canada Artist Grant 


I received a Canada artist grant with th Ontario Arts Council last year and worked on a project that Canada artist grant. I was awarded a grant of $2000 for emerging artists to learn a new skill or for professional development including the purchase of new art supplies. You can learn more about this Canada artist grant in this post!


Canada artist grant/OAC artist grant proposal

For my Canada artist grant I chose to focus on papermaking in my application. I proposed learning how to make paper out of plants and learning how to use the letterpress machine. I wanted to letterpress some of my Patched poems on handmade pieces of map paper I made. I also proposed to purchase some mould and deckles to help me with papermaking some abaca and cotton pulp, a vat and other paper making supplies. 


Canada artist grant/OAC artist grant 

I chose to work with a local paper making company the Papertrail to be able to learn about paper making easier. The Papertrail is based out of New Dundee, Ontario. That’s also where I attended workshops, completed my letterpress poetry project and ordered my papermaking supplies. 


I attended 5 paper making workshops in total with the grant money. A basic beginner paper making workshop, two workshops on making paper with plants and two on using the letterpress. 

Canada artist grant


About the Paper making Workshops 


The Beginner Papermaking Workshop 

This workshop took place in August of 2022 and in this workshop I learned basic skills and refined my paper making skills. We also learned how to use pigments in paper and got to experiment with the sheets of paper we made. 


Letterpress Workshop #1 

I did this workshop in November, during this workshop I learned how to use the letterpress and the history of the letterpress. I also did some test prints of some text with the letterpress. 

canada artist grant with paper making


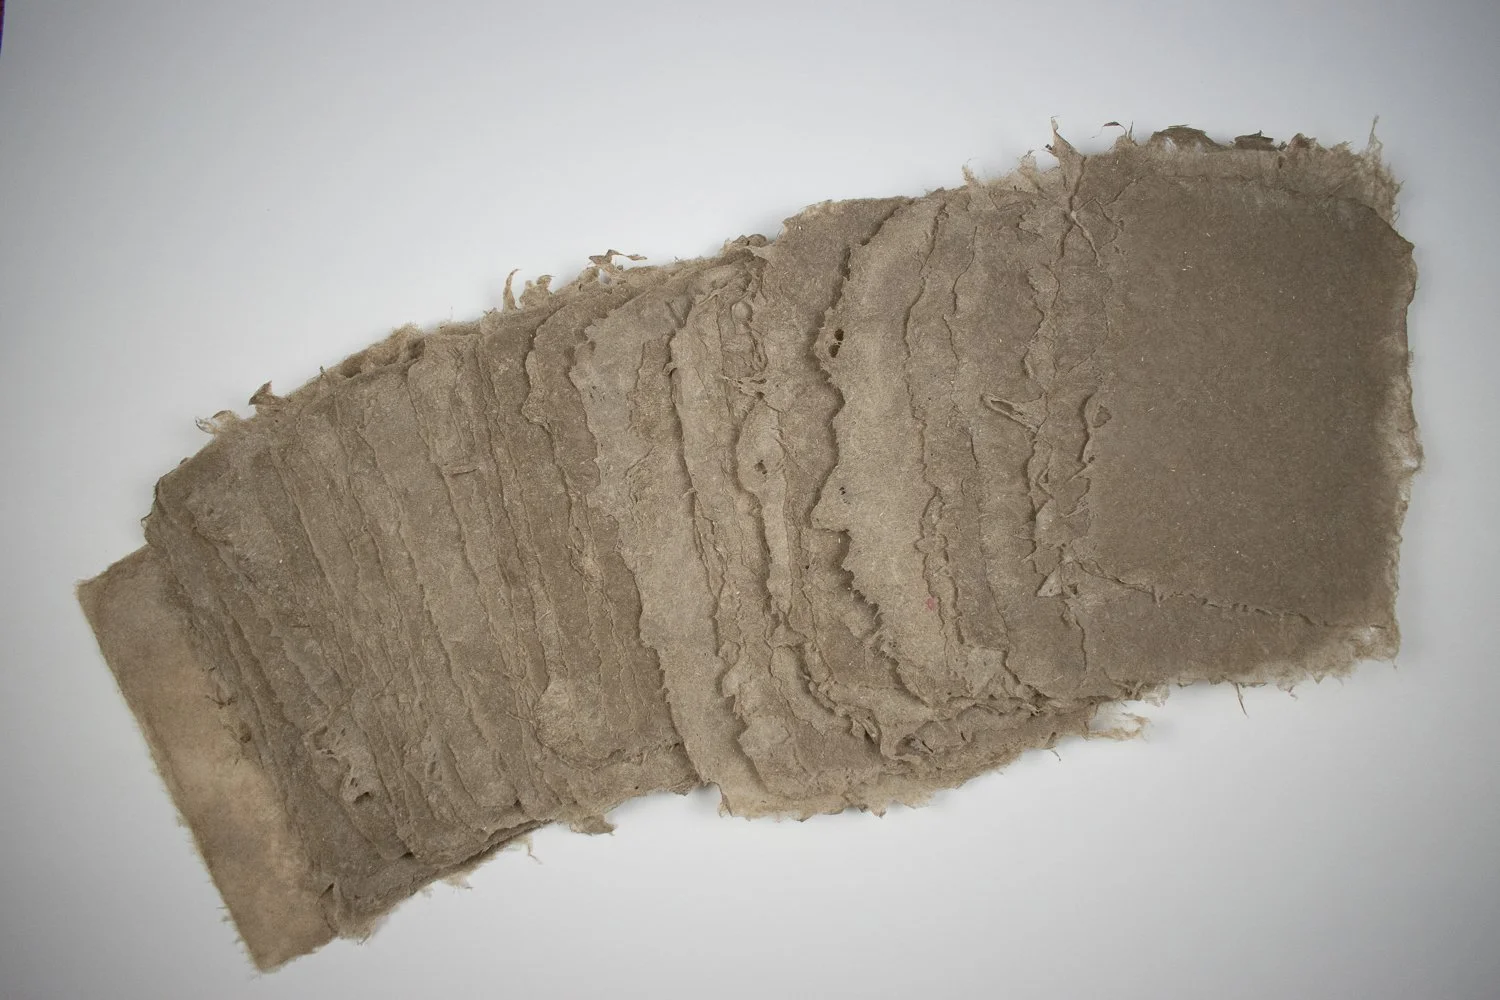
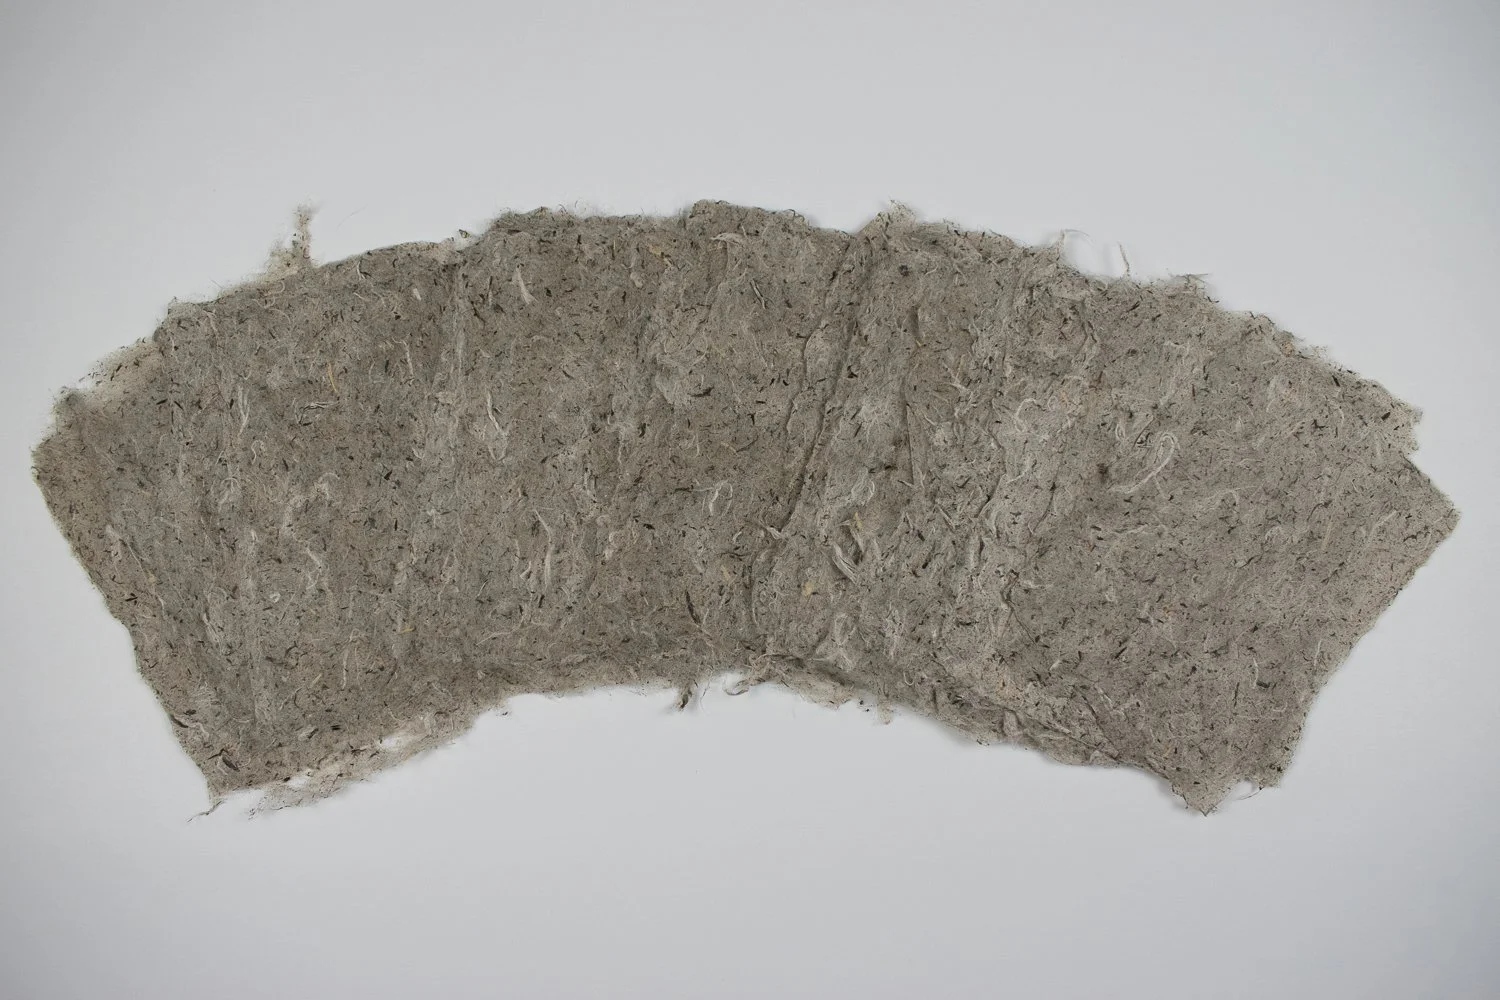
Paper Making with Plants Workshop

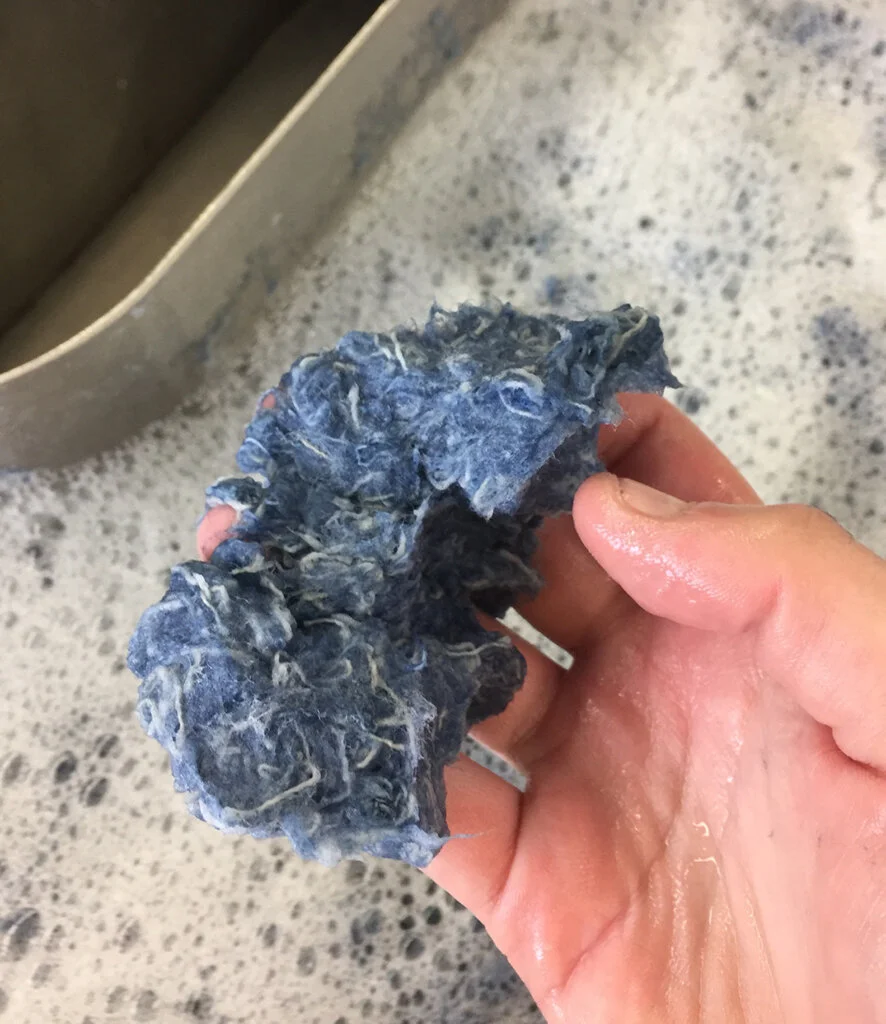
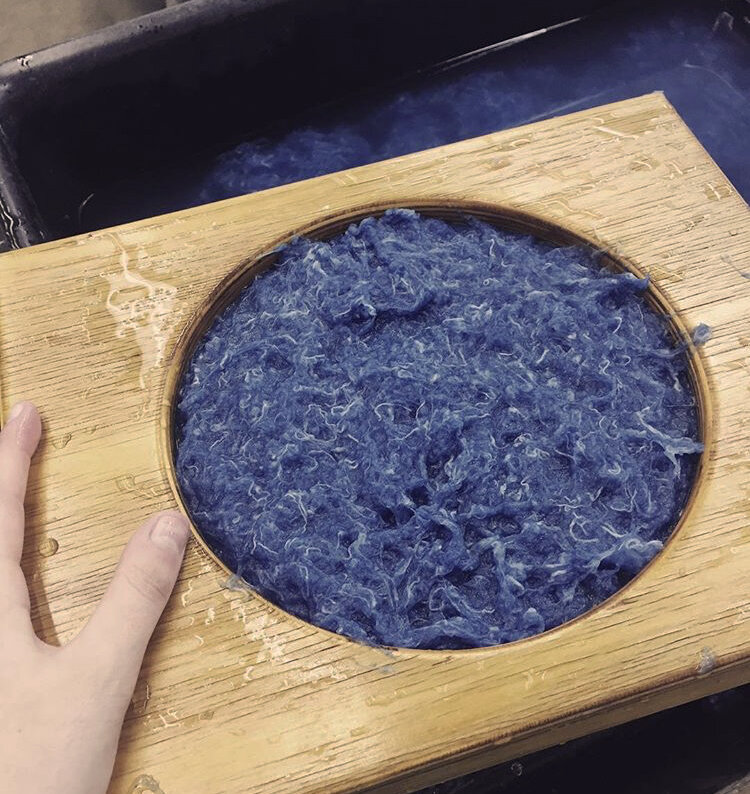
This workshop was a two day back to back workshop in December. In these workshops I learned how to make paper from plants. I made paper from the stems and pods of milkweed as well as from flax. I got to use their hollander beater and beat the pulp by hand. 


Letterpress Workshop #2 

This workshop happened in December. I got to complete my Patched poem project and letterpress 5 different poems I wrote onto handmade map paper. 


All of these workshops were full day workshops. I am grateful for the Canada artist grant with OAC and being able to develop my paper making skills as an artist as well as being able to complete a project and purchase new paper making supplies.  


You can purchase my book Patched that has more poems here!


Related Articles:

How to make paper out of denim

Microgrant with cyanotypes

OAC grants

Patched Book


How are Paper Made with Plants 


How are paper made with plants? Paper can be made with natural fibres whether it is plants or a material that comes from plants like 100% cotton fabric. Learn how are paper made with plants below!


How are paper made with plants - the process 

When making paper with plants the fibres of the plants need to be weakened. Naturally a plant has strong fibres and has a lot of strength. 

how are paper made with plants

The paper above is made with milkweed seeds as part of my OAC grant in 2022.

How are paper made with plants 

How are paper made with plants - Harvesting

There are a lot of books and online resources to explain how to make paper with plants. First of all, you need to decide what plants you want to use to make paper. You can begin by harvesting or collecting those plants. Different parts of the plant will make different kinds of paper like different types of plants will make different types of paper. 


For example, you can make paper with leaves, stems, seeds, or buds/flowers of the plant and they will all form different types of paper. 

The paper above is made with flax as part of my OAC grant in 2022.

It’s always good to collect lots of plants. You want to collect at least ¾ of a pound of that same part of the plant. You don’t want to mix different parts of the plant together because they are all going to take different times to weaken. For instance, a stem is stronger than a leaf so it is going to take longer for that fibre to weaken so it will be soft enough to make a sheet of paper. 


How are paper made with plants - Cooking

Next you will want to begin researching to determine how long you will want to cook/boil the plant so that you can weaken the plant fibres. You will need a large pot and you will want to use a different pot then the one you use to cook your meals. You can find lots of large pots at the thrift store.


You will also need a long spoon to stir the plant. You can keep checking it every 20-30 minutes to see if the plant is getting softer. You want the plant to begin to break apart. 

The paper above is made with stems from milkweed as part of my OAC grant in 2022.

How are paper made with plants - Blending/Beating the Pulp

After the plant has been cooking and is soft you can transfer the mixture to be able to blend it or beat the pulp. Certain pulp could be mixed in a blender, a hollander beater or with a Jiffy Mixer. Some pulp-like stems that are a bit tougher or woody could be beaten with a hand paddle to create the pulp. You want to mix/blend/chop the pulp into small pieces so that they can come together like puzzle pieces when you form your sheet of paper. 


How are paper made with plants - Forming the Sheet

Once you have your plant pulp ready to go you can pour it into a vat which is a large container of water. You will also need a mould and deckle to make your paper. Begin pouring in about 250mL of the pulp into your vat. Stir the pulp so that it floats and doesn’t settle at the bottom of the vat. Scoop your mould and deckle by skimming the surface of the water and collecting the pulp. You will have to practice with this.


Then remove the frame and press the pulp off the screen and onto some sheets of felt. Separate each sheet of paper with a sheet of felt and repeat the process. 


How are paper made with plants - Pressing and Drying

Once you have your stack of papers you will need to press the water out of the pages. You can use a paper press or squeeze the water out with pressure. 


You can then place the paper in a drying rack by carefully peeling the paper off the felt. The paper will need to dry for 24 hours.


Now you know how are paper made with plants and you can begin harvesting and experiments with different types of plants to make your own paper! 


You can see more of my handmade paper here!

Related Articles:

How to Make Paper Out of Denim

Paper Art Installation

Shop Handmade Paper

OAC Grant for Paper Making


All About the Women’s Studio Workshop in NY

In March 2018, I attended the Women's Studio Workshop Residency in NY. (The small town of Rosendale to be exact).  I stayed for 5 weeks at the Women’s Studio Workshop. I got to experience part of the winter and part of the spring at the Women’s Studio Workshop. The Women’s Studio Workshop in NY was founded in 1974. I was in the paper making studio at the Women’s Studio Workshop in NY.

Coming from a small town, I really enjoyed the small community of Rosendale. I felt very safe and welcomed while at the residency, in town or on the Rail Trail nearby.  Read more to figure out if attending the Women’s Studio Workshop in NY as your next artist residency is right for you!

About Women’s Studio Workshop in NY

Women’s Studio Workshop in NY was founded in 1974 by Ann Kalmbach, Tatana Kellner, Anita Wetzel, and Barbara Leoff Burge. Their goals were to develop a studio workspace for artists to create new work and collaborate. Programs were centered on the artistic process. The first studios were in a two-story single-family home. Etching was in the living room, paper making was in the attic, and screen printing was in the basement.

This passage is from their website - To read more- click here


The Rail Trail at the Women’s Studio Workshop

I was working in the paper making studio while I was there. I really enjoyed hiking in the area, especially on the Rail Trail. While on the Rail Trail I did numerous Patched installations using my handmade map paper. The Rail Trail is very close to the residency and is a great source of inspiration to artists there including myself! 

Patched is an ongoing installation since 2017 by artist Jackie Partridge that uses handmade map paper pulp on trees where the bark has naturally peeled away.

Patched is an ongoing installation since 2017 by artist Jackie Partridge that uses handmade map paper pulp on trees where the bark has naturally peeled away.

At the Women’s Studio Workshop residency when I was there I made a lot of paper working with maps and blue jeans. I took advantage of the hollander beater and worked on my piece Sediment. You can learn more about the project here! 


I got to try the vacuum table for the first time which was very exciting for my practice. I worked on creating large sheets of map paper on the vacuum table which I used in my Patched video. See the installation of this large sheet of handmade map paper below:

Highlights of the Women’s Studio Workshop in NY

I loved the Women’s Studio Workshop because the staff are very helpful and kind whether it is showing you how to use equipment or giving you a ride into to town to get groceries. I liked how every lunch we had a potluck so we could really get to know one another.

What I Love About Artist Residencies

I am always highly focused and productive while on an artist residency. It is nice to be in a new place and see how that relationship directly impacts my work. Since my work is directly related to the land and environment there is always new inspiration, ideas, and projects when I am in a new place. This is always exciting for me! Residencies give you time, space and materials to explore and practice with. New ideas always form when I am away from home!

What I Did at the Women’s Studio Workshop in NY

  • I had an opportunity to present my art in an artist talk while I was there to people at the residency and locals in the Rosendale area

  • I submitted a piece of art I made as part of their alumni collection

  • I met other artists and learned new techniques like the vacuum table

  • I explored the local scene and enjoyed the Rail Trail 

Patched installation made on the Rail Trail at the Women’s Studio Workshop in NY

Patched installation made on the Rail Trail at the Women’s Studio Workshop in NY

Accommodations at the Women’s Studio Workshop

I stayed with another person and we shared a bathroom and kitchen but had separate bedrooms. Bedding was included. Kitchen utensils and equipment were included. The price for the residency is highly affordable and their are options for grants from the residency or to apply for funding externally. 

I would definitely go back to this artist residency again! 


How You Can Go to the Women’s Studio Workshop in NY

Check out their calendar on dates of when you can apply to their upcoming programs and classes! https://wsworkshop.org/opportunity-calendar/


I would highly recommend this residency to all the artists out there!

Related Articles

 Read about my artist profile on their webpage

Read my interview about my residency here!

Learn about the Patched Project Here!

Purchase my Patched Book -here!

Learn about the Women’s Studio Workshop Here!

Here is another great website to help you find the right artist residency for you! https://resartis.org/covid-19-updates/

Read about my artist residency at the Vermont Studio Center!

Connect with me on social media by clicking on one of the icons below!

Make Seed Starters

Seed starters are a fun and easy DIY project you can do by yourself or even with kids. Make seed starters as great gifts to grandparents, moms, coaches, teachers and any special gardener in your life. Make seed starters to teach about the environment, composting, recycling, Earth day, growing seeds etc. You can teach students or kids about the importance of protecting the bees by adding seeds in your seed starter that will naturally attract bees. Bees generally gravitate to flowers that are yellow or purple. 

The supplies needed to make seed starters

The supplies needed to make seed starters

Materials Needed to Make Seed Starters

  • A blender, food processor or hand blender (Smart Stick)

  • Water

  • Recycled paper like construction paper/newspaper/egg cartons

  • A package of seeds

  • A cookie cutter

  • Plastic tray or baking sheets

  • Sponge or tea towel

  • A strainer/sieve

  • A bowl


*If you don’t want to use a blender you can rip the paper into smaller pieces and let in soak in water for longer until it becomes a pulp

Make Seed Starters!

  • Start by tearing up your recycled paper into small pieces about an inch in size

  • Start by putting a couple of handfuls of torn paper into the blender

  • Add some water to cover the paper. It should all be wet. If you have added too much water add some more paper. If your paper is dry add more water. Your blender should be about half full of water and paper. You don’t want to do too much and overwork your blender

  • Blend it for a minute or so. Pour the blended pulp (paper torn up with water mixed) into a strainer over a bowl

  • Squeeze excess water out through the strainer into the bowl by pressing the pulp with your hands

To Receive More Detailed Instructions on How to Make Seed Starters - click the link below!


To receive video instructions of this process, environmental themed activities for kids - click here!

You can dab out the water of a seed starter with a tea towel or sponge to help it dry faster

You can dab out the water of a seed starter with a tea towel or sponge to help it dry faster

What to Do Once You Have Made Your Seed Starters 

  • You can plant them in a flower pot, garden or start them in your home and then transplant them

  • You can give them as a gift to someone


Ideas for Making Your Own Seed Starters

  • Hole-punch your dried seed starter and add a ribbon to make an ornament

  • Glue on your dried seed starter to decorate a card

  • Use seed starters as place cards for a dinner party

  • Give seed starters as a party favour

  • Give seed starters to a school/library or community centre to plant a garden

  • Create seed starters as a birthday party activity

  • Try mixing other colours of paper pulp together to make a multicoloured seed starters

  • Make seed starter fridge magnets

  • Use seed starters as gift tags for presents


Related Articles

Check out my Teachers Pay Teachers Store for more art resources!

Watch YouTube videos on acrylic painting on my channel

Learn about how I make paper with denim here!

Purchase the Seed Starter Lesson, Video and activities here!

Tag your seed starters on instagram @jackiepartridgeart - I would love to see them!

Join my mailing list to receive updates, discounts and special surprises! 

Connect with me on social media - click on one of the icons below! 

Fields -Mirror Installation by Jackie Partridge

Fields is made from colourful sewn thread and flax handmade paper. It measures 18’x 3.5.’ I made this work in 2015 while completing my MFA at Concordia university in Montreal, QC. 

I created this artwork by sewing on a dissolvable fabric and layering different colours of thread. Sometimes, I would have a different colour in the bobbin and a different colour in the tread. I sewed in a back and forth manner to resemble the repetitive motion of planting and harvesting crops in fields. After sewing, I dissolved the fabric and took the pieces to the paper making studio where I squeezed flax pulp through a tube in patches of the sewing. Once I was done applying the pulp I put the artwork through the paper press to squeeze out excess water as part of the paper making process. Then I let the artwork dry flat; it took about 24 hours to dry. There are about 10 separate panels of this artwork in total. 

The pieces of this art installation are quite delicate and fragile. I suspended them with thread that tied onto the individual pieces. 

Usually this installation is hung against the wall but in this installation from 2017, I got to hang this textile artwork in front of the mirror. I loved how the thread was reflected and looked like a long continuous line drawing. When the artwork hangs against the wall it does create some really beautiful shadows.I would love to add to this piece and make it larger in the future. 

You can see the original installation of this piece - here!

Jackie Partridge and Fields thread with handmade paper installation
Detail of Fields installation

Detail of Fields installation

To see current artwork - click here!

To purchase art - check out my shop!

To see some of my current art please follow me on social media - by clicking on one of the links below!

Paper Making with Recycled Blue Jeans

Paper making with recycled blue jeans is a time consuming process but it also a rewarding process. I love being sustainable in my art practice and using recycled blue jeans to make paper is exciting! I will show you how to make paper with recycled blue jeans in this post! I started paper making in 2015, where I was working as a teaching assistant in a paper making class during my MFA. See some behind the scenes about the process of paper making below!

How to Make Paper Out of Recycled Blue Jeans -What You Need

  • a hollander beater

  • water

  • a vat (plastic tub that is shallow)

  • mould and deckle

  • felts

  • sponge

  • jeans that are 100% cotton (they must be 100%)

  • Check out this article for other paper making supplies you need!

How to make paper out of jeans, denim pulp by Jackie Partridge

The Process for Making Paper out of Recycled Denim

Denim Doily -Medium
CA$90.00
Add To Cart

You can make paper with found denim as long as the fibres are 100% cotton. In order to make paper out of fabric the fibres need to be natural and not include synthetic fibres. Now a days it can be hard to find blue jeans like that!

Above is an image from the paper making process —> turning denim —> tiny strands of thread —> to pulp —> to paper


Steps for Paper Making with Recycled Blue Jeans:

In order to make the denim paper the blue jeans must be collected rinsed with water (this removes the laundry detergent so the pulp isn’t foamy) and cut into tiny 1cmx 1cm squares. I sort my denim by shade of blue jeans this will get you different blues in your paper. You will have to rinse the jeans in the washing machine with no detergent for a couple cycles to remove any soap residue. If you don’t properly wash the denim you will get lots of foam and bubbles when you run them through the hollander beater. After the squares are cut they are put into a beater that grinds the natural fibres into tiny blue threads.

After the pulp is beaten down to tiny threads (taking around 4 hours or longer). The longer you beat the denim pulp the less threads appear in the paper. The pulp is added into a vat of water and a mould and deckle are used to create sheets of paper. You will scoop the recycled blue jean denim pulp with a mould and deckle in the vat of water and pull a sheet. Then remove the top mould and press the screen on sheets of felt squeezing out excess water. You can also press down with a dry sponge. Layer a felt of the wet sheets of paper. Then place the stack of felts and blue jean paper in a press to squeeze out extra water. Remove sheets of paper and dry them by hanging or in a flat dryer. It will take over 24 hours to dry.

A handful of denim pulp

A handful of denim pulp

Here is abaca paper mixed with denim pulp in a mould and deckle (this forms the shape of the paper)

Here is abaca paper mixed with denim pulp in a mould and deckle (this forms the shape of the paper)

Leftover pulp dries and water can be added to make it pulp again!

Leftover pulp dries and water can be added to make it pulp again!

Denim Paper-Light and Dark Blue
CA$28.00
Shade of Blue:
Quantity:
Add To Cart

Sediment -Art Installation by Jackie Partridge

Sediment art installation by Jackie Partridge was started in 2017. I started paper making in 2015 where I was working as a teaching assistant in a paper making class during my MFA. See some behind the scenes look at a current project and learn about the process of paper making below!

Sediment is an ongoing art installation since 2017 where I form sheets of handmade paper with blue jeans from my grandfather. Currently there are about 300 pieces of handmade paper.

Sediment art installation with blue denim handmade paper by Jackie Partridge

My grandfather is a retired farmer who sold the family owned century farm in 2012.

The paper acts as a memory and are stacked on the floor like waves in the water.

This piece is inspired by the artwork Remnants that also used old farming clothes belonging to my grandfather.

Learn how to make paper out of denim here! This explains the process for making this artwork.

Sediment art installation by Jackie Partridge made of 300 sheets of handmade denim paper

In order to make the denim paper the blue jeans must be collected rinsed with water and cut into tiny 1”x1” squares. After the squares are cut they are put into a beater that grinds the natural fibres into tiny blue threads.

The paper making process- denim pulp

The paper making process- denim pulp

After the pulp is beaten down to tiny threads (taking around 4 hours or longer) The pulp is added into a vat of water and a mould and deckle are used to create sheets of paper.

This is the mould and deckle used to create the circle sheets of paper

This is the mould and deckle used to create the circle sheets of paper

Marbled Denim Paper
CA$28.00
Quantity:
Add To Cart

I invite you to take a look at the handmade paper I sell in my shop. Check out my beautiful handmade paper art here!

Don’t forget to enter your email at the bottom of the post to save 15% off artwork!

To save 15% off my artwork - enter your email below!

Pocket Full of Sunshine
CA$90.00
Add To Cart