Selling on Society6


I started selling on Society6 in 2022. What’s nice about selling on Society6 is that it is passive income meaning you just really need to upload your designs and people will purchase your designs and Society6 does the rest of the work. I will explain more about how Society6works and what the experience of selling on Society6 is like in this blog post keep on reading below!


This blog post contains affiliate links to my Society6 designs meaning I get a small commission if you purchase from my links. Thanks for supporting a small business.

Selling on Society6 - What is it?


Society6 is an online marketplace where artists can upload their artwork, which is then printed on a variety of products such as art prints, home decor, furniture, phone cases, apparel, and more. It provides a platform for independent artists to monetize their designs by making them available for purchase on different items.


When a customer buys a product featuring an artist's work, Society6 handles the printing, packaging, and shipping, while the artist earns a percentage of the sale. Artists can choose which products they want their designs to appear on and set their own profit margin for art prints, but for other products, the profit margin is fixed by Society6.


The platform is popular with people looking for unique, creative, and trendy designs across various product categories, and it serves as a convenient way for artists to reach a broader audience without having to handle manufacturing and logistics.


What Products Can You Sell on Society6

There are lots of products and different categories of products that are sold on society six so there are really a lot of options for different types of products that you can sell as an artist. 


I recommend that you do your research and really decide what your art would look best on. You don't need to sell every single product that Society6 offers. Instead sell the products that make sense for your artwork and the customers who are interested in your art. 


I also recommend testing the product quality to ensure that it meets your standards. 

Here is a list of all of the different products that are offered on Society6

1. Wall Art:

  • Art Prints

  • Framed Prints

  • Canvas Prints

  • Tapestries

  • Posters

  • Wall Murals

2. Home Decor:

  • Throw Pillows

  • Throw Blankets

  • Rugs

  • Shower Curtains

  • Wall Clocks

  • Curtains

  • Furniture (benches, side tables, bar stools, etc.)

  • Duvet Covers

  • Comforters

  • Towels

  • Pillows and Pillow Shams

3. Tech Accessories:

  • iPhone Cases

  • Samsung Galaxy Cases

  • Laptop Sleeves

  • Laptop Skins

  • iPad Cases

  • iPad Skins

4. Apparel & Accessories:

  • T-Shirts

  • Leggings

  • Hoodies

  • Socks

  • Tote Bags

  • Backpacks

  • Face Masks

5. Stationery:

  • Notebooks

  • Stickers

  • Wrapping Paper

6. Furniture:

  • Coffee Tables

  • Credenzas

  • Bar Stools

  • Side Tables

  • Benches

7. Bedding:

  • Duvet Covers

  • Comforters

  • Pillow Shams

  • Bed Sheets

8. Lifestyle & Outdoor:

  • Yoga Mats

  • Water Bottles

  • Travel Mugs

  • Picnic Blankets

9. Kitchen & Dining:

  • Cutting Boards

  • Coasters

  • Serving Trays

  • Coffee Mugs

Again, you don't need to sell all of these products, just choose the products that are going to make sense and work best for your artwork and your customers who are interested in purchasing from you.

Click the button to see the products I offer in my Society6 store!


What I love about selling on Society6

I really love that. It is a print on demand website meaning all I have to do is upload my designs and follow the instructions on their website and Society6 does the rest of the work. Society6 does the marketing the advertising, they create the products, and do the printing. Society6 handles all the payments. They handle any refunds or exchanges if those happen, and they also handle the shipping, they ship all of the products, and package them and send them off to whoever ordered them from all around the World.


I find that selling on Soceity6 really feels like passive income because all I have to do is upload my design and Society6 does the rest of the work. 


I also love that Society6 has a variety of different products. They are also constantly updating and adding more products to their collection every year.


Society6 also has an affiliate program meaning you can share your affiliate links and receive an extra commission if someone makes a purchase from one of the links that you share. This is a great way to receive extra income and to share your links on your blog post in your Pinterest on your social media or to just share your product design with your friends and family. 


Things that I don't love about Society6

Since Society6 does a lot of the work, you only receive a small percentage of sales as an artist usually just a few dollars. This kind of sucks because some of their products are a couple hundred of dollars. But again, the trade-off is that this is passive income and you don't really need to do a lot of the work Society6 is doing most of the work. 


In 2023 Society6 recently changed that you have to pay $15 a month to receive more analytics or to upload additional designs. Originally you could upload an unlimited amount of designs and now to be able to upload an unlimited amount of designs. You have to pay the $15 a month.


Personally, I don't make a ton of sales on Society6, so right now I am choosing not to pay the $15 a month. I just take whatever sales that I make on Society6 as a nice bonus.


If you are like me and choose not to pay the $15 a month on Society6 and just have a free account like myself then you were able you'll only be able to upload 10 designs. 


10 designs doesn't seem like a lot but remember one design can be listed on so many different products that I have listed earlier in this blog post. Even with 10 designs, you have the potential to sell hundreds of different items. 


If you have any other questions about selling on Society6 or what selling on Society6 is like feel free to contact someone from Society6 by visiting their website below. 


You can check out my Society6 store by clicking on the button below. 

Photo Editing Tips for Instagram


Make your photos stand out with these photo editing tips for Instagram. If you are an artist and you like showing your art on Instagram, you will want to check out these photo editing tips to excel on the Instagram app. Keep reading to learn about my photo editing tips for Instagram!


Photo Editing Tips for Instagram

Even if you know nothing about photo editing, I will share a very easy app that you can use to edit your photos professionally on Instagram!


Photo Editing Tips for Instagram - Adobe Lightroom

I love this app because it is free and that is the Adobe Lightroom app that you can get for your iPhone or smartphone. Adobe Lightroom is a paid program to use on your laptop or your desktop computer, but it is a free app that you can use on your phone which is totally awesome!

With lightroom, you can purchase a variety of different presets. There's also free presets that already come on the app itself. This makes editing your photos on Instagram very easy and it will give a consistent look to your Instagram feed. 


You can easily edit photos in black-and-white and they can have the same consistent look with all the photos that you edit.


There are lots of different photo editing tutorials available on YouTube so do your research and check them out!


Emily Jeffords and Jenna Kutcher sell great presets that you can use if you are a photographer or you are an artist. 


With Adobe Lightroom, you can easily edit Photos and adjust the brightness and contrast the exposure. The saturation, the hue, you can also crop photos and sharpen them as well.


If you are an artist or a photographer, I highly recommend purchasing a Adobe Lightroom for your laptop or desktop because you will be able to edit your photos a lot faster and quicker using AI. You can edit them even faster, you can remove different blemishes, or dust particles in the background, unwanted stray hairs that come across your artwork and you can just make your artwork look super professional.


When I take photos of my artwork, I like to set up my lighting and place my artwork on a white background to make sure that when I'm editing the photo, I can adjust the brightness to make sure that the white is fully white, and that all of the colours in my artwork are looking as natural and as realistic as possible. 


Photo Editing Tips for Instagram - Good Lighting

Having great lighting is an amazing photo editing tip for Instagram so it's good to try to capture natural light whenever possible. You can take photos of your artwork outside or you can try to use multiple lights, so that you don't have any shadows cast on your artwork when you take a photo. 

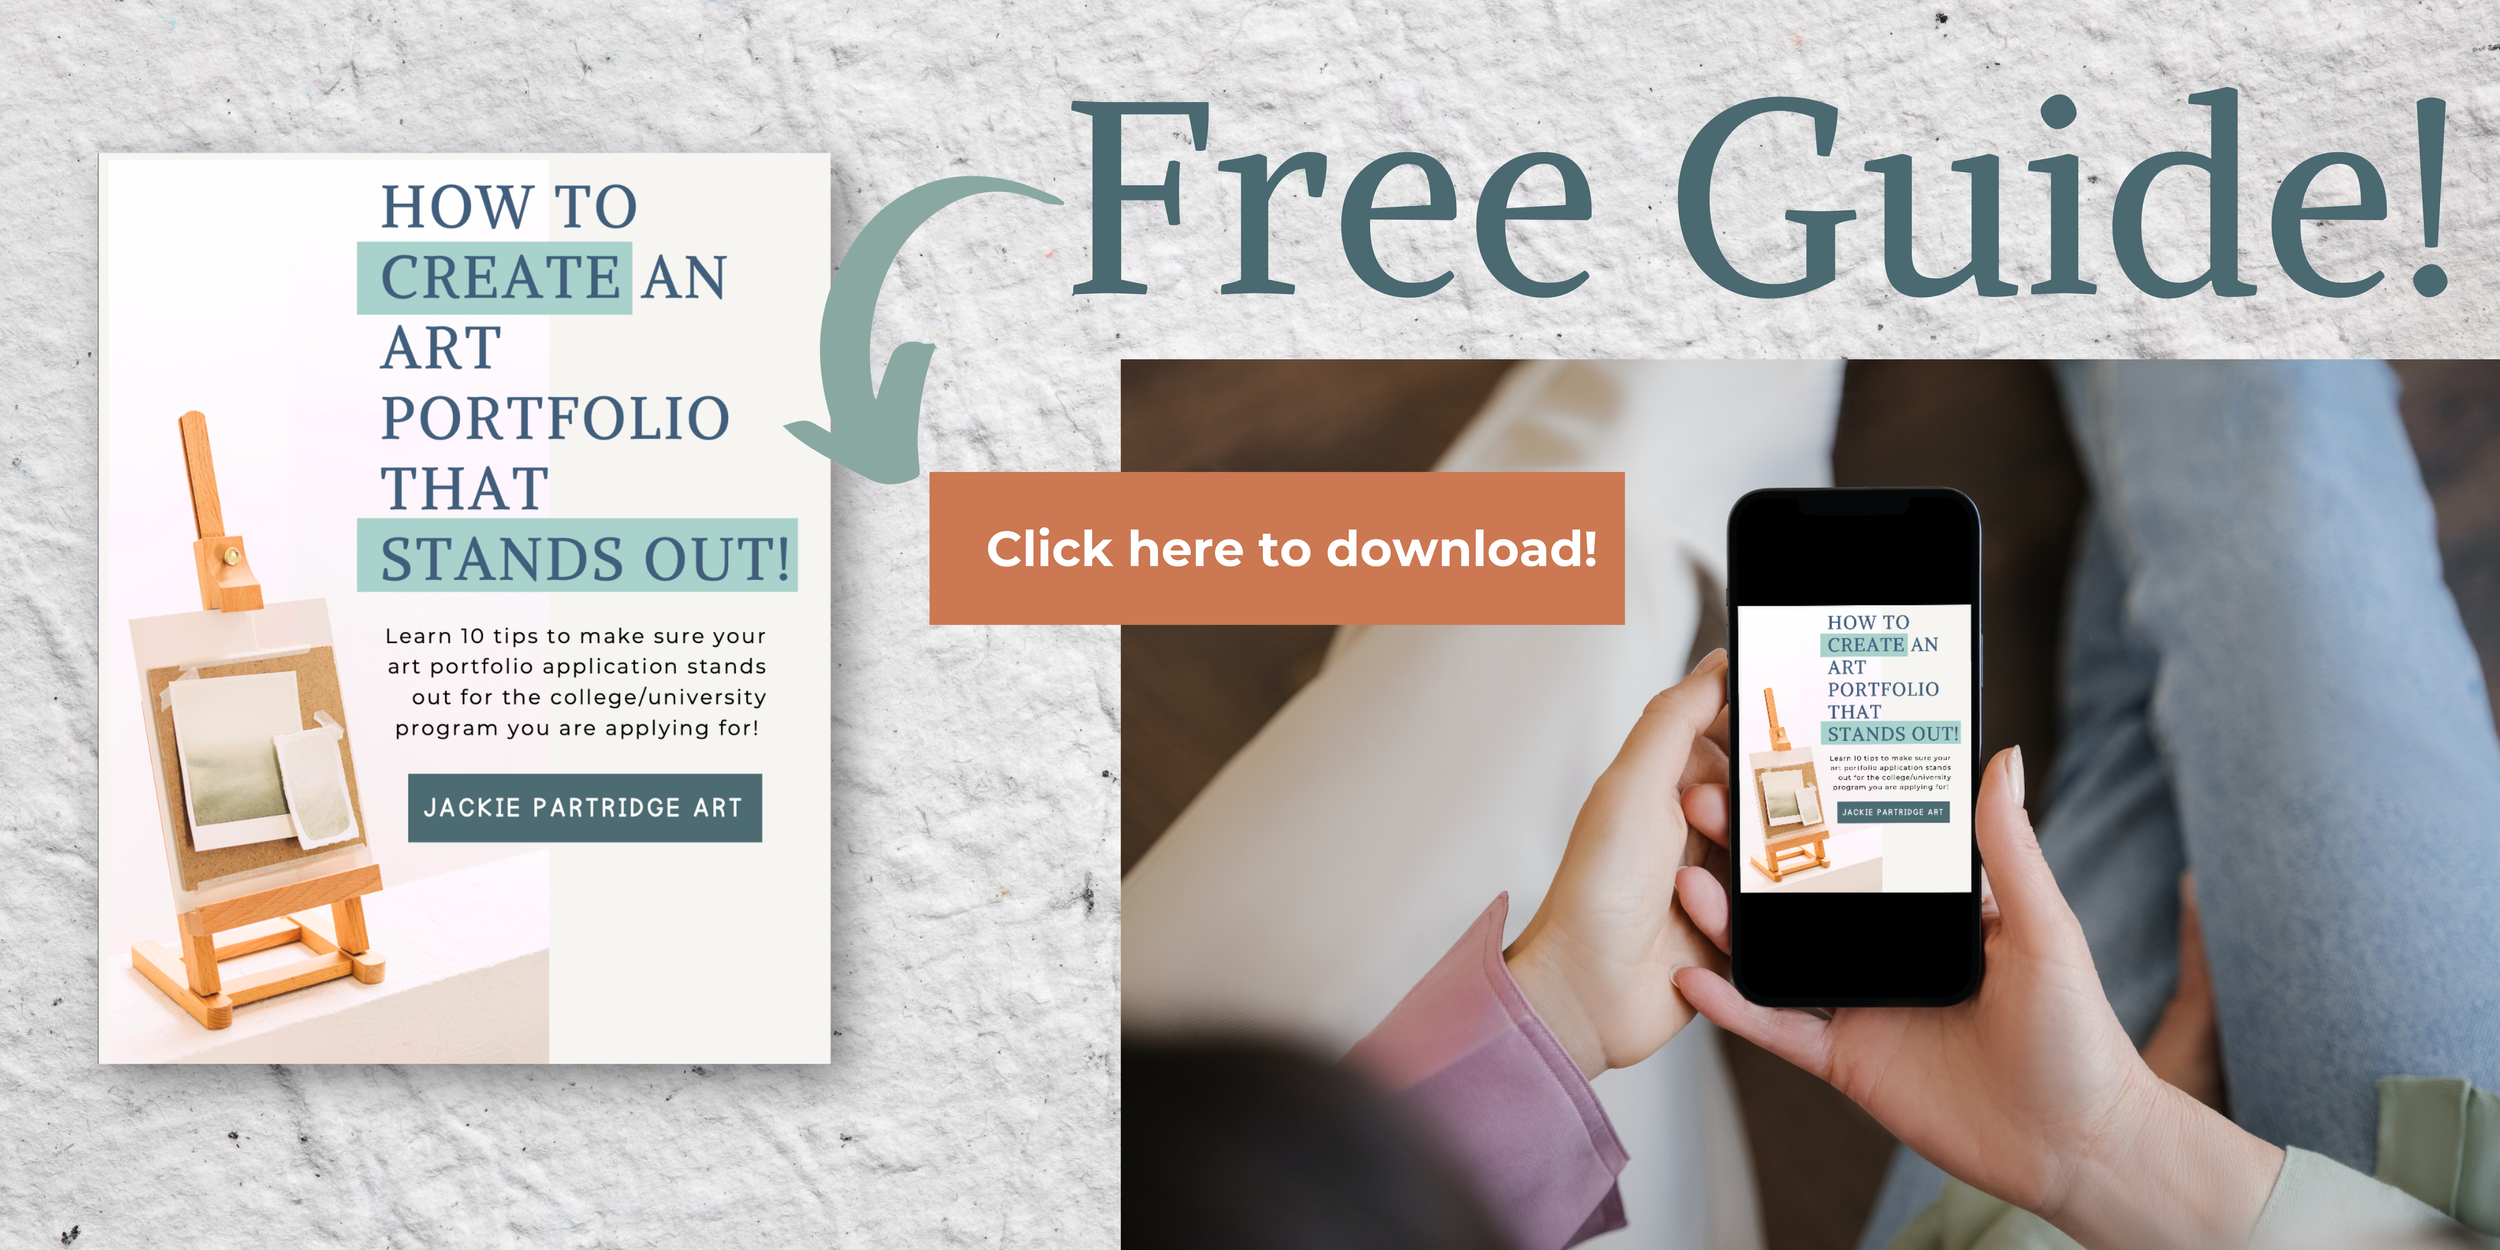
If you are an artist who is putting together an art portfolio application for college or university you can click the button below to check out my 10 tips. 


This is a free guide to make your art portfolio application stand out from the crowd and get you accepted into the art program or art related program of your choice.


If you are an artist, but you're not sure which art school or art program if you want to apply to you can click the button below to get my free video training where I help you answer different questions and think about what you need to consider, so that you can choose the perfect art school or art program for you.


You can click this link to check out a list of popular art schools in North America


You can click here to check out a list of popular art schools, all around the world


The good thing about Instagram is that you don't need to have a perfect beautiful curated feed to be successful on Instagram. A lot of social media wants you to show your authentic self. Not only can you show finished pieces of art but you can show work in progress, you can show the materials, and the techniques that you use. You can show research and inspiration as well.


Click on the Instagram button below to follow me on Instagram and send me a DM if you found this blog post helpful. Thank you so much.


Is an Artist an Entrepreneur?


Is an artist an entrepreneur? How do you make money as an artist? These are the questions I get asked all the time. I want to help teens and artists be successful artist entrepreneurs!


Is an artist an entrepreneur?

Yes, an artist is an entrepreneur. Often artists, especially emerging artists, just starting out rely on another job like a part-time job to help support their art career as it starts. 

To learn more about being an artist/entrepreneur check out some

Being an artist is owning your own business. You are in charge of not only making art but finding ways to sell your art or creative ideas and make money.


Like any entrepreneur, it is important for artists to have an online presence like a website, social media and grow an audience. 


Having an email list as an artist is important to help you to stay in touch and communicate with your customers/fans of your art. 


It is smart to have multiple streams of revenue to be able to support you as an artist. I have listed different streams of revenue mentioned below. 


You want to have different streams of revenue because different times in the year might bring in different amounts of money. For example, you might sell more art in November before the holiday but less in January, so it is good to have a plan in place for other ways to make money instead of just relying on one income stream. 

is an artist an entrepreneur?


Here are 21 Ways Artists Can Make Money as an Entrepreneur: 


  1. Selling Original Artwork: Direct sales of paintings, sculptures, or other original pieces.

  2. Commissioned Work: Creating custom pieces based on specific requests from clients.

  3. Prints and Reproductions: Selling prints of original artwork, often at a lower price point.

  4. Merchandise: Designing products like t-shirts, mugs, or phone cases featuring their art.

  5. Art Licensing: Licensing their artwork for use in various products, advertisements, or publications.

  6. Teaching Art Classes: Offering in-person or online art classes and workshops.

  7. Patreon and Subscription Services: Providing exclusive content to subscribers in exchange for a monthly fee.

  8. Public and Private Grants: Applying for grants offered by organizations that support the arts. You can read about how to get an artist grant here!

  9. Art Residencies: Participating in residencies that provide financial support and resources for artists. You can read about how an artist residency works - here!

  10. Gallery Exhibitions: Partnering with galleries to exhibit and sell artwork.

  11. Art Fairs and Markets: Selling work at local, national, or international art fairs and markets.

  12. Freelance Design Work: Taking on projects like graphic design, illustration, or branding for clients.

  13. Online Marketplaces: Selling artwork through platforms like Etsy, Saatchi Art, or Redbubble. I sell on Society6 - you can see my store here!

  14. Social Media Sponsorships: Collaborating with brands on sponsored posts or campaigns on platforms like Instagram.

  15. YouTube and Online Content: Creating content for YouTube or other platforms, monetizing through ads and sponsorships. You can check out my acrylic painting YouTube channel here and subscribe!

is an artist and entrepreneur


  1. E-books, Books, and Tutorials: Writing and selling instructional books or video tutorials. You can check out my animal drawing book for teens and preteens- by clicking here! You can also check out my art teaching resources store here!

  2. Art Subscriptions and Memberships: Creating subscription boxes or memberships that deliver art to customers regularly.

  3. Crowdfunding: Using platforms like Kickstarter or Indiegogo to fund specific projects.

  4. Public Art Commissions: Receiving commissions for public artworks, such as murals or sculptures.

  5. Collaborations with Brands: Partnering with companies for special projects or limited edition products.

  6. Art Installations: Designing and installing art for events, exhibitions, or permanent collections.


Being an artist and an entrepreneur can be very rewarding and very challenging. 


It can be rewarding to make money for what you are passionate about and talented at. 

It can be challenging because it might be harder or take longer than you expect to make consistent money online. 


Often times you want to make art but you are being pulled in different directions and needing to focus not just on making art but how to balance your time to keep up with all of the tasks of being an entrepreneur. 


Here are some tasks that an artist/entrepreneur has:

  • Posting on social media

  • Updating your website

  • Making art

  • Selling art 

  • Shipping art 

  • Emailing your email list 

  • Growing your audience 

  • Marketing/advertising

  • Tracking income and expenses 

  • Managing your art inventory 

  • Research and development of new ideas 

  • Learning and implementing to become a better artist/entrepreneur

  • Lots of administrative tasks 

  • And so much more! 


Let me know in the comments what revenue streams you are interested in. 


If you want to be an artist -be sure to download my art portfolio tips guide that includes 10 tips to make your art portfolio application stand out and get you accepted into your desired school. 

Rainbow Field 4
CA$110.00

How to Review Goals- My 6 Month Goal Review


Learn how to review goals so that you can hold yourself accountable and achieve your goals! Keep reading to learn how to review your goals! This is my sixth month review of my goals. We are halfway through 2024! 


Review of 2024 Goals 


Here are my goals for 2024 that I made at the start of January. It is important to look at the list and think about are these goals that I still want? Sometimes we make goals and we forget about them or we make them and they aren’t actually goals that we want badly enough to work towards. 


Goals for 2024:

  • 2000 people on my email list 

  • Run ads to market business 

  • Take my business full time by making more money than I did as a teacher 

  • Offer cyanotype commissions

  • Have 2-5 exhibitions 

  • Receive 1-2 artist grants 

  • Growing my fine art Instagram to 1000 followers

  • Participate in 1-2 art markets 

  • Get my artwork or prints in a local shop

  • Take more photos from the series Patched and Tree Houses 


After looking at this list - these are all still goals that I want to achieve for the most part. I want them because they are going to help me grow as an artist and push my art business forward! 


Now that we have gotten clear on our goals and know that they are all still goals that are desired we can get specific about each goal and figure out how we have been working towards them. 

Review of Progress at 6 Months on Goals 


It is good to review your goals frequently, but especially at the sixth month mark. Figure out how close or how far off you are from achieving your goals. If you are really far off you might need to let go of some projects to make more time for your goals, you might need more motivation, you might need to schedule more time or you might need to do more research to figure out how you can attain your goals. 


If you are close to hitting your goals or if you have already accomplished those goals - then maybe the goals were too easy. Maybe you need to adjust the goals and make them more challenging. If a goal isn’t challenging enough you aren’t going to be driven to pursue it. 


2000 people on my email list 

2000 people on my email list - I currently have __about 400________ on my mailing list. I have really focused on growing my mailing list by offering two new freebies for people to sign up. Now people can sign up to save 15% on artwork (fill out the form below).


They can get my FREE guide for 10 tips to improve your beginner acrylic painting skills that includes a roadmap to help you transition from a beginner to an intermediate painter- click here! 


My free 14 pages of symmetry drawing pages perfect for grades 4-7- click here to download those! 


Or my FREE guide with 10 Tips to help you create an art portfolio that stands out and gets accepted into an art program or school of your choice! Click here to download!


I will be creating a couple of new freebies and trying Pinterest ads for the first time soon to grow my mailing list. 


Run ads to market business 


Run ads to market business-I will be trying Pinterest ads to share my Portfolio Tips free guide to have more people on my mailing list to be able to launch my art portfolio course. I haven’t done this yet but hope to do it in the next few months.


 Take my business full time by making more money than I did as a teacher 

I have been able to stay at home with my son while working on my business, I have worked on an art commission, done some workshops, coaching and I am getting ready to launch my art portfolio course. I am working on adding my TPT art teaching resources and lessons to my store. 


Offer cyanotype commissions

I am in the process of working on the cyanotype commissions. I haven’t had the chance yet to make cyanotypes- but I hope to do this soon!


Have 2-5 exhibitions 

I currently have 4 exhibitions scheduled for this year. I have made it a habit to try to apply to one exhibition each Monday. This doesn’t always happen but carving out time for it in my schedule has been really important. 


Receive 1-2 artist grants 

I have received 0 grants so far. On Mondays I work on grant applications and exhibition applications so this has helped me have a set time to apply. I have applied to 2 grants and I plan on applying to at least 3 others. 

Growing my fine art Instagram to 1000 followers

I currently have 763 Instagram followers on my account @jackiepartridge_ and I have 1170 followers on my art teaching Instagram account. I have been prioritizing planning my content and creating reels which has helped me gain followers. I has been very hard to post consistently and grow both accounts.


Participate in 1-2 art markets 

I am scheduled to participate in 0 markets. I have decided I don’t want to do this goal anymore. Markets are a lot of work and with a young toddler it’s not how I want to be spending my time right now, Instead of doing markets I have decided to contact local shops to sell my art instead. 


Get my artwork or prints in a local shop

I will start to reach out this summer and prepare my pitch soon. I am still working on this. 


Take more photos from the series Patched and Tree Houses 

I have started to make photos from this series and will continue to do so now that it is warmer outside.  I will hopefully do this in the summer and fall! 


Here is a behind the scenes look at how and why I review my goals. I think reviewing your goals at the sixth month mark is especially important. A lot can change in six months. It is not too late to get started on your goals if you haven’t been making progress on them. Good luck with your goals! 


Be sure to stay connected and follow me on social media by clicking on one of the icons below! 
how to review goals

Should i get my mfa?


Should I get my mfa? Is it worth getting an mfa? How do I feel about having an mfa? I will answer these questions in this blog post, so keep reading! If you are wondering if you should get your mfa, you will want to read this!


Should i get my mfa?


An mfa is a Master of Fine Arts degree; it is the next step for artists after they have pursued their Bachelor of Fine Arts or bfa. 


To help you decide if you should get your mfa I think it helps to hear from other artists why they got their mfa. 

Why I got my mFA


I got my mfa because I am someone who loves learning and researching. I would definitely consider myself a lifelong learner. I love reading, trying new things and exploring. As I was approaching the end of my bfa I knew that I had more that I wanted to learn and explore. I knew I wanted to be an artist and I knew I could grow and push myself as an artist by getting my mfa. 


After my bfa I went to teacher’s college for a year long program and used that time to work on preparing my art portfolio for my mfa application. I did my mfa at Concordia university immediately after I was done with teacher's college. You can read more about my time at Concordia University -by clicking here. 


During the end of my bfa is when I finally was doing less projects that the professors were instructing us and had more creative freedom to explore the type of art I wanted to make. Don’t get me wrong I was grateful for the art projects during my bfa as they really allowed me to explore new techniques, styles and media but once I discovered what I liked I wanted to make more.


In my bfa I had a lot of great professors that really pushed me and believed in me. They were quite excited when I told them I wanted to pursue an mfa. You can read more about my time of my bfa at Lakehead University by clicking here! 


In summary, I wanted to do my mfa because I wasn’t done learning, I wanted to keep reading and researching, I wasn’t ready to start working, I wanted to continue to use this time to be a student. I knew that when I would start working full time or having a baby that it would be really difficult to balance my time and to make as much art as I wanted to make. I just wanted to take advantage of this time and make more art. I had a really strong vision about making art, exhibiting art and making my income from being a full time artist. You can read more about why I wanted to become an artist here!


So, should you take your mfa? That’s completely up to you. Keep in mind, that when you submit your portfolio for your mfa you will need a cohesive body of work. You will also need to write a clear letter of intent on what you plan to do while pursuing your mfa. If you need help with your mfa portfolio application - click the button below to check out one on one coaching with me where I can help you with your application and give you feedback!


If you need help with your bfa art portfolio - download my FREE guide with 10 tips for making your art portfolio stand out and get accepted! 


How to Store my Art Supplies?


How to store my art supplies? You have spent all this money on art supplies, it would be a waste to have to throw away those art supplies because they haven’t been stored properly. Let me help so you know how to store your art supplies. Read more about how to store my art supplies below.


How to store my art supplies:

Having proper storage of art supplies is important so that you don’t damage your art supplies -having them be wasted and so that your art supplies stay organized and you know where everything is. 


Keep Your Studio Space Clean

  • Make sure the storage area is clean and free from dust, moisture, and direct sunlight

  • This will prevent art and art supplies from becoming damaged.


Categorize and Sort Your Art Supplies

  • Group similar items together. For example, keep paints with paints, brushes with brushes, and sketching tools with sketching tools.

  • This will help keep your art supplies organized and so that you know where to put things when you are done. This prevents your art studio from becoming a dumping ground and cluttered. Now you will know that everything has a “home” and a special spot to go! 


Use Containers to Store Art Supplies

    • Invest in containers or boxes to keep your supplies organized. Clear containers can help you see what's inside without opening them. You could also use boxes with labels, baskets or jars. I like plastic containers because it keeps art and supplies dry and protected.


Consider Accessibility:

    • Store frequently used items in easily accessible places like on your desk or workstation. Less frequently used items can be stored in less accessible areas like in a box or closet. 


Protect from Light and Moisture:

    • Some art supplies, such as paints and paper, can be sensitive to light and moisture. Store them in a cool, dry place away from direct sunlight.

    • This keeps the art supplies in good condition and lasting longer! 


Make Use of Shelves:

    • Shelving can save space and make it easier to see and access your supplies.


Purge and Declutter:

    • Regularly go through your art supplies and get rid of items that are no longer in good condition or that you no longer use. This keeps your art studio organized and it will be easier to find the art supplies you are looking for! 


Rolling Carts or Drawers:

    • Rolling carts or drawers can be a convenient solution, especially if you like to move your art supplies from one place to another.


Protective Cases for Fragile Items:

    • For delicate items like pastels or graphite sticks, consider using protective cases to prevent breakage.


Store Canvases and Papers Flat:

    • If possible, store canvases and papers flat to prevent warping or damage.


Temperature Consideration:

    • Some art supplies may have specific temperature requirements. Check the product labels for any special instructions and store accordingly.


Create a Dedicated Workspace:

    • If you have the space, create a dedicated art workspace where you can store and access your supplies easily.


Do you have any tips for how you like to store your art supplies? Let me know in the comments below! 


Be sure to follow me by clicking on one of the social media icons below! 

My Art Studio Tour


Want to see my art studio from behind the scenes? Here is my art studio tour! I will show you my art studio tour and explain the studio zones I have set up and how that helps to keep my art studio nice and organized.  I have worked hard setting up and organizing my art studio - so here is my art studio tour! Enjoy! 


Art Studio Tour 

In my current home my art studio is in the basement - you can read more about having a basement art studio here! It is also a small home studio -here are some tips for having a small studio. 


Even though my art studio is in the basement I really wanted to focus on having lots of light. Having lots of light in your art studio is important to not only see what you are creating but to be able to photograph and document it well. Whether you are documenting your art for social media or to apply to exhibitions or grants, great lighting is a must! 

As you walk down the stairs there is some storage under the stairs which I use for holiday decorations but I do store some of my artwork and art supplies/examples I use to teach art workshops. 


As you enter the studio I have a dehumidifier which is great for controlling the moisture in a basement studio to keep my art dry and prevent any damage from occurring. 


In the centre of the room when I am filming for my painting YouTube- Jackie Partridge Art- I have a long folding plastic table. I also have my lighting set up and camera on a tripod so I can be ready to film painting tutorials whenever I feel like it.  I have all my paints and painting supplies ready to go on the table or underneath the table so I can easily access them. I tend to try and film a years worth of videos in advance. So, when I’m not filming I pack away my painting stuff so that I have more room. 


On another desk, I have my sewing machine set up with all my sewing supplies. On a shelf beside that desk I have canvases, paper making supplies, embroidery and sewing supplies. On another shelf I have lots of fabric that I have collected from the thrift store over the years. I have another shelf that has on the go projects. A lot of these projects are DIY ideas for my son’s birthday, or decor to make for our new home. The last set of shelves is to store artwork that I am selling and is listed for sale on my art shop.

Along some of the walls is a ledge that I use as shelves and store books for research and inspiration like art history textbooks. 


I have a small book case where I store more inspirational books, business books and sketchbooks of ideas. 


I have a stack of rubbermaid containers that store artwork for exhibitions and more art to sell. Those are behind a wooden screen divider to mask them and make studio look more beautiful.


Art Studio Tour 


Art Studio Zones 

It is a good idea to set up your art studio into different zones so that you know where everything is and you can keep everything organized. This makes the clean up process much easier since everything has a place. This is especially important if you are a mixed media artist like me who is working with lots of different supplies. 


When you are setting up your studio consider making your art studio zones work for the type of art you make. You may need more or less zones than I have. Take my art studio zones as examples! 


Sewing Station

I have a desk setup with a chair and my sewing machine. I have thread and fabric nearby so I am ready to do sewing projects. 


Painting/Filming for YouTube Station 

I try to batch film acrylic painting tutorials for my YouTube channel so that I am not constantly filming throughout the year. I have a long folding plastic table set up in the middle of the room with my lighting and camera ready to record. I have all my paint and brushes easily accessible. When I am not filming I can pack everything away so I have more space in my art studio. 


Research Station

I have lots of books and old sketchbooks filled with ideas. I have a bookshelf and built-in shelving on a couple of walls in my studio. 


Storage of art Supplies 

I keep my art supplies in containers and on shelves. I try to keep everything in view and are sorted with all similar art supplies together so they are easy to find! 


Storage of art to ship for selling 

I have some shelves with art in boxes that are ready to ship. I have all my shipping supplies near the art so that I am ready to ship my art to my customers quickly. 


Storage of art to exhibit 

Artwork that I am exhibiting is in plastic rubbermaid containers to keep them protected. I have a wooden folding screen to hide this art out of the way to make my art studio more aesthetically pleasing. 


Wall Space to hang art and test installations 

I have wall space to install art and take photographs of it. This comes in handy when I am listing art to sell or applying to be in art exhibitions. I also have an empty desk as a worktable to work on current projects, to plan projects, draw or write down ideas. 


I hope you have found this art studio tour helpful and that this art studio tour has given you some ideas on how you can set up and design your own functional art studio. 


Be sure to connect with me and follow me on social media by clicking on one of the icons below!

The Biggest Difference Between BFA and MFA


I want to share the biggest difference between BFA and an MFA. As an artist who attended both a BFA and MFA program for Fine Arts I want to share some of the differences and similarities between both of the programs. Learn the biggest difference between BFA and an MFA by reading more below! 


The Biggest Difference Between a BFA and an MFA Program 


The biggest difference between a BFA and an MFA is the level of independence you have as a student. In both programs as you move throughout the years from a first year student to a senior in your final year there is more independence. This level of independence is to prepare you for the “real world.” So, that you can be successful in whatever path you choose as an artist- whether it be having exhibitions, applying to grants, teaching at a college or workshops, working at an art gallery etc. 


With an MFA program in particular, you apply knowing you have a plan in place. In many MFA applications you create a letter of intent stating what you intend to do while in the MFA program. In your letter of intent you might explain what you plan on researching, what techniques you want to try, what installation methods you want to try and what your goals are for taking the program. What type of artist do you want to be? What do you hope to get out of the MFA program?


If you are needing help writing your letter of intent you can check out my one on one coaching and I am happy to review your letter of intent in an hour or half hour coaching session. 

Click the button below to book a coaching session with me! 


Download 10 FREE Tips for creating an art portfolio that stands out! 


Other Differences Between BFA and MFA programs:


Readings 

An MFA program is usually more research focused. There are more papers you need to write as a student and more required and suggested readings. Required readings are assigned by a professor in a class - often you are graded on participation and a written response in relation to the assigned reading. 

Suggested readings are given to you by your professor or a visiting lecturer as a reading you should look into that will help you develop as an artist. The suggested readings might be based on a technique you use, an artist working in a similar style or medium (either a contemporary artist or an artist from history), or based on the subject matter you are making art about.  These readings might get suggested to you during a critique or while meeting with your professor.


Both types of reading are valuable and help you really develop the way you talk and write about your work. 


You can read more about my MFA time at Concordia University by clicking here. 

You can read more about my BFA time at Lakehead University by clicking here. 

Projects 

In a BFA program, especially the first three years there are a lot of different types of projects. While the projects get more open ended as you progress through your BFA they do start specific. The reason for this is to encourage you to experiment and push yourself and your art. The professors want to challenge you and to help you figure out what art you want to make and why you want to make it. Why does it matter? What does your art communicate?


In an MFA there are little to no guided projects. You are in charge of managing your time and creating what you want to work on. That’s why having a clear letter of intent and clear goals are so important in an MFA.


Due Dates 

In a BFA program there are clear due dates, there are more check ins and in progress critiques. In an MFA there are still deadlines but you need stronger time management skills to be able to manage deadlines. There is less feedback of work in progress as you are often working on art at home or in your studio. There is little to no class time to work on your art in an MFA whereas in a BFA you have some class time so professors can give you timely feedback. 


These are some of the biggest differences between a BFA and MFA program. Let me know in the comments if you have any questions about these programs. 


Click the button below if you would like help with your art portfolio application to a BFA or MFA program! 


Join the waitlist below for my NEW art portfolio course for high school students applying to a college or university art program! 


Basement Art Studio Tips and Tour


I want to take you on a behind the scenes look at my basement art studio. If you are thinking about having a basement art studio -here are some tips for you! To learn more about my basement art studio and see pictures, keep reading! 


Tips for Having a Basement Art Studio

Here are some tips for having a basement art studio and what you need to consider when planning your studio. 


Store Artwork Safely 

In a basement especially it can be a space that is prone to water damage or flooding. You want to consider how you will store your work to ensure it is protected. For example, You should store it off the ground on a shelf ideally in a waterproof container. If you are working with expensive art supplies or supplies that might get damaged like paper you might want to consider how you store those supplies in your basement art studio too!


Consider the Lighting

Light is very important for artists. Basements tend to be very dark, so you will want to consider where the brightest spots to work will be and possibly where to add extra lighting. In my basement art studio I am lucky to have two large windows. By those windows is where I have set up my desks to work. At the back of the studio where you first enter by the staircase it is a lot more dark and that is where I have set up storage. 


Plan the Zones in Your Studio

Having a home studio can be challenging and it is easy for it to become a storage area and not a functional art studio. Before you start moving furniture it is helpful to plan where to place large items and what zones you will need in your studio. Here is a list of possible zones for you basement art studio:

  • Art supply storage - could be grouped in categories if you use multiple supplies 

  • A place for messy art - could also think about different zones if you are working with different supplies 

  • A place for cleaner art 

  • A place to store finished art 

  • A place to ship art if you sell art online 

  • A place to display or photograph artwork 

  • An office area 

  • A place to film or record things if needed


Tour of my Basement Art Studio

Here are some photos of my basement art studio and how I have decided to set things up. I am an artist working with mixed media. I do acrylic painting, paper making, sewing, cyanotypes and some drawing. I have added some storage of final projects and a wood shop work bench for building things and completing any home renovation projects. 


I hope you have found these tips and photos helpful for planning your basement art studio. Connect with me on social media by clicking on one of the icons below! 

How to be an Organized Artist

Being an organized artist can be difficult. In this blog post I will show you steps for how to be an organized artist. As a creative person it is normal to have lots of ideas and many things on the go. Being an organized artist helps with accomplishing your goals and staying productive throughout the year. Learn the steps for how to be an organized artist below!  


How to be an Organized Artist

Being an organized artist is crucial for maintaining a productive and efficient creative practice. Here are some tips to help you stay organized:

  • Create a Dedicated Workspace: Set up a designated area for your artistic work. Having a specific space can help you stay organized and focused, and it will make it easier to access your materials whenever inspiration strikes.

  • Establish a Routine: Develop a consistent daily or weekly routine for your artistic practice. Set specific times for creating art, researching, and handling administrative tasks to maintain a balanced workflow.

  • Organize Your Supplies: Keep your art supplies and materials neatly organized. Utilize storage solutions such as drawers, shelves, and containers to categorize and store your supplies effectively, making them easily accessible when needed.


  • Maintain a Calendar: Use a calendar or a planner to keep track of important dates, deadlines, and upcoming art events. This will help you stay on top of your commitments and ensure that you allocate enough time for each project.

  • Digital Organization: Organize your digital files, including reference images, sketches, and completed artworks. Create a structured system for naming and storing files on your computer or cloud storage to facilitate easy access and retrieval.

  • Set Realistic Goals: Establish achievable short-term and long-term goals for your artistic practice. Break down your goals into smaller, manageable tasks, and prioritize them based on their importance and deadlines.

  • Keep a Sketchbook or Journal: Maintain a sketchbook or journal to record your ideas, inspirations, and progress. Use it to jot down thoughts, sketches, and any creative insights that you can refer back to when working on new projects.

  • Clean and Tidy Up Regularly: Schedule regular cleaning sessions for your workspace to keep it organized and clutter-free. A clean and tidy environment can contribute to a clear and focused mind, fostering creativity and productivity.

  • Stay Updated with Technology: Explore digital tools and software that can help streamline your creative process. There are various digital platforms and apps designed specifically for artists to manage projects, track progress, and organize their work efficiently.

  • Seek Inspiration and Learning: Continuously seek inspiration and opportunities for learning. Attend workshops, art exhibitions, and events to stay motivated and connected with the artistic community. Engaging with other artists can provide valuable insights and foster creative growth.

By implementing these strategies, you can develop an organized approach to your artistic practice, allowing you to focus on your creativity and produce high-quality artwork consistently.


Let me know what steps from this list you are going to implement to become a more organized artist. Click on one of the icons below to connect with me on social media!

Click here to download my FREE guide with 10 tips for creating your art portfolio for school applications!


How to Make a New Year Routine


Creating a new year routine can help you start the year on a positive note and establish healthy habits that can contribute to your overall well-being and productivity. A new year routine is essential for artists because it helps you get clear on what you want and what projects you should take on during the year. Here are some steps to help you create a new year routine:

How to Create a New Year Routine

  • Reflect on the Previous Year: Take some time to reflect on the previous year. Consider what worked well for you, what you would like to improve, and what you want to achieve in the upcoming year.

  • Set Clear Goals: Define your goals for the year ahead. Whether they are personal, professional, or health-related, having clear goals will provide you with a sense of direction and purpose.

  • Establish Priorities: Determine your priorities for the year and identify the areas of your life that require the most attention. Focus on what matters most to you and allocate time and resources accordingly.

  • Create a Daily Schedule: Develop a daily schedule that incorporates activities aligned with your goals and priorities. Include time for work, exercise, relaxation, hobbies, personal development, and social activities. Make sure to allocate time for self-care and relaxation to avoid burnout.

  • Start with Small Changes: Implement small changes gradually to ease into your new routine. Trying to overhaul your entire routine at once can be overwhelming and may not be sustainable in the long run. Begin with manageable adjustments and gradually build upon them.

  • Stay Consistent: Consistency is key to the success of any routine. Stick to your schedule as much as possible, even on days when you don't feel motivated. Consistent practice will help you form positive habits and make your routine more effective over time.

  • Stay Flexible: While consistency is important, it's also essential to remain flexible and adaptable. Be open to making adjustments to your routine as necessary to accommodate unforeseen circumstances or changes in your priorities.

  • Prioritize Self-Care: Make self-care a priority in your routine. Ensure you get enough sleep, eat a balanced diet, exercise regularly, and take time for activities that bring you joy and relaxation. Taking care of your physical and mental well-being is essential for maintaining a healthy and sustainable routine.

  • Track Your Progress: Monitor your progress regularly to assess how well your routine is working for you. Keep track of your achievements, challenges, and areas for improvement. This will help you stay motivated and make necessary adjustments to your routine as you progress throughout the year.

  • Stay Positive and Persistent: Be patient with yourself as you adapt to your new routine. Stay positive and persistent, even if you encounter obstacles or setbacks along the way. Remember that creating a new routine takes time, effort, and dedication.

By following these steps, you can create a new year routine that promotes productivity, balance, and overall well-being, setting you up for a successful and fulfilling year ahead as an artist.

Why Should You Have a New Year Routine as an Artist?


Having a new year routine can be particularly beneficial for artists for several reasons:

  • Consistent Practice: A routine helps artists establish a regular practice schedule, which is crucial for honing their skills and improving their craft. Regular practice can lead to significant artistic growth and development over time.

  • Time Management: A structured routine enables artists to manage their time effectively. By allocating specific time slots for different artistic activities such as creating art, researching, and networking, artists can ensure they make progress on their projects without feeling overwhelmed or unorganized.

  • Enhanced Creativity: While routine might sound restrictive, it can actually foster a conducive environment for creativity. By setting aside dedicated time for creative exploration and experimentation, artists can encourage their imaginative processes to flow more freely.

  • Establishing Discipline: Following a routine fosters discipline, which is essential for any artist looking to make consistent progress in their work. Discipline helps artists stay focused, motivated, and dedicated to their craft, even during times when inspiration might be lacking.

  • Goal Achievement: A well-structured routine can assist artists in achieving their artistic goals. By incorporating specific milestones and tasks into their routine, artists can make steady progress toward their creative ambitions throughout the year.

  • Balancing Artistic and Personal Life: A routine can help artists strike a balance between their artistic pursuits and personal life. By setting clear boundaries and allocating time for rest, relaxation, and other non-artistic activities, artists can prevent burnout and maintain their overall well-being.

  • Building Momentum: Following a routine can create a sense of momentum and consistency in an artist's practice. This regularity can help artists build momentum and maintain a steady pace of progress, which is essential for sustained artistic growth and success.

  • Stress Reduction: Having a routine in place can reduce stress and anxiety associated with the uncertainty of artistic careers. Knowing that there is a structured plan in place can provide a sense of security and stability, allowing artists to focus more on their creative process.

By incorporating a well-thought-out routine into their daily lives, artists can enhance their productivity, creativity, and overall well-being, ultimately contributing to their long-term success and fulfillment in their artistic endeavors.


Be sure to follow me on social media by clicking on one of the icons below! I’d love to know what your new year routine looks like!

Goal Setting for Artists Tips


Goal setting for artists tips and tricks will help you set and define realistic goals for your art business or practice. Goal setting for artists is a great habit to get into at the start or end of the year but also to refer to your art goals every quarter. Read below to learn more about goal setting for artists! 


Why is Goal Setting Important for Artists?

Goal setting is crucial for artists for several reasons:

  • Direction and Focus: Setting goals helps artists clarify what they want to achieve and where they want their artistic endeavors to lead them. It provides a clear direction and keeps them focused on the specific milestones they need to reach.

  • Motivation and Inspiration: Having well-defined goals can inspire and motivate artists to push themselves beyond their comfort zones. Goals provide a sense of purpose and drive, helping artists to stay committed to their craft even during challenging times.

  • Measurable Progress: Setting goals with measurable outcomes allows artists to track their progress. This not only helps them assess their growth over time but also provides a sense of accomplishment as they reach each milestone.

  • Professional Development: Goals can serve as a roadmap for an artist's professional development. By setting achievable goals, artists can work on enhancing their skills, expanding their portfolio, and building a strong artistic identity.

  • Time Management: Setting specific deadlines and time-bound goals encourages artists to manage their time effectively. This can improve their productivity and ensure that they are consistently working towards their desired outcomes.

  • Accountability and Responsibility: When artists set goals, they hold themselves accountable for their own progress and success. This sense of responsibility can encourage them to take ownership of their artistic journey and strive to achieve the best possible results.

  • Personal Growth: Goal setting can promote personal growth and self-improvement. As artists strive to achieve their goals, they often develop new skills, overcome challenges, and gain valuable insights that contribute to their overall development as individuals and professionals.

  • Long-term Vision: Setting long-term goals helps artists envision their desired future and create a roadmap for achieving their artistic aspirations. This broader perspective enables them to make informed decisions and take actions that align with their ultimate artistic vision.


Goal Setting for Artists Tips

How to Set Goals as Artists

Goal setting can be a crucial component for any artist looking to progress in their craft and career. Here are some tips to help you set effective goals as an artist:

  • Define Your Vision: Start by defining your long-term vision. What do you want to achieve in your career as an artist? Where do you see yourself in 5, 10, or 20 years? Having a clear vision will guide your goal-setting process.


  • Set Specific Goals: Make sure your goals are clear and well-defined. Rather than setting a broad goal like "become a better painter," set specific, achievable goals like "complete three oil paintings by the end of the month" or "learn a new painting technique by attending a workshop."


  • Make Your Goals Measurable: Include quantifiable aspects in your goals so that you can track your progress. For instance, set a goal to sell a certain number of artworks, participate in a specific number of exhibitions, or gain a certain number of followers on your social media platforms.


  • Set Realistic and Achievable Goals: While it's good to challenge yourself, it's important to set goals that are attainable within a specific time frame. Unrealistic goals can lead to frustration and demotivation.


  • Break Down Your Goals: Divide your long-term goals into smaller, manageable milestones. This will make it easier to track your progress and keep you motivated. For instance, if your long-term goal is to have a solo exhibition, your smaller goals could include creating a body of work, securing a venue, and marketing the event.


  • Create a Timeline: Set deadlines for your goals to create a sense of urgency and accountability. Having a timeline will help you stay focused and organized in your efforts.


  • Prioritize Your Goals: Identify which goals are most important to you and prioritize them accordingly. Focus on goals that will have the most significant impact on your artistic development and career.


  • Stay Flexible: Be open to adjusting your goals as needed. As you progress and circumstances change, you may need to revise your goals to stay aligned with your vision.


  • Seek Feedback and Support: Share your goals with trusted mentors, fellow artists, or a supportive community. Their feedback and encouragement can provide valuable insights and help you stay motivated.


  • Celebrate Your Achievements: Acknowledge and celebrate your accomplishments, no matter how small. Celebrating your successes will help you stay motivated and maintain a positive mindset.


Want to go to art school but unsure how to create an amazing art portfolio that gets you accepted into your dream program. Click the button below to join my waitlist and be the first to hear about my course!


Remember, goal setting is a dynamic process that requires regular review and adjustment. Stay committed to your goals, stay focused, and keep striving for improvement.


Click on one of the icons below to connect with me on social media and let me know what your goals are this year!


Click here to download my FREE guide with 10 tips for creating your art portfolio for school applications!


Goals for 2024


Each year I complete goals for my art business. Here are my goals for 2024 focused on the fine art side of my art business. I have two parts of my art business: a side on art education and a side on my artist/fine art side. Read more to learn about my goals for 2024!  What are your goals for 2024?


Last year I was over ambitious when it came to my goals. I was pregnant and had my son in April 2023. I was more tired than I expected and wasn’t able to achieve a lot of the goals I wanted. We also bought our first home and moved in while I was nine months pregnant. So, 2023 was a very busy year to say the least! 


This year, my goals for 2024 I want to be more realistic in what I want to achieve now that I know how much work a baby and new house bring. 


Here are my goals for 2024! 

  • 2000 people on my email list 

  • Run ads to market business 

  • Take my business full time by making more money than I did as a teacher 

  • Offer cyanotype commissions

  • Have 2-5 exhibitions 

  • Receive 1-2 artist grants 

  • Growing my fine art Instagram to 1000 followers

  • Participate in 1-2 art markets 

  • Get my artwork or prints in a local shop

  • Take more photos from the series Patched and Tree Houses 

Sometimes it helps to dream a little. If I set goals too easy I might get bored and not put the effort in to make them happen. It can be hard to have the balance of goals being too hard or too simple. This year I want to work on focusing on implementing and getting things done. Even just a couple small things add up and make the difference over time. 


Click on one of the icons below to follow me on social media and let me know if you found this post helpful! All the best in 2024! 


Related Articles: 

2023 goals

Art goals


Review of 2023


2023 was a busy year for us. Here is my review of 2023. Learn about my busy year and review of 2023 below! In this review of 2023 I will go over the goals I made for 2023 related to art goals, personal, business and family goals.


Review of 2023- My Thoughts

We had our baby in April 2023 and bought our first home around the same time. I moved into our home while my baby was seven weeks old. We now live a few hours away from family and I am understanding that things take a lot longer with a baby. My goals for 2023 were ambitious and I would say over ambitious. I know I may not have hit them all or some but it has helped me get clear of what I want. 


My Goals for 2023 with a Review of 2023 

Business Goals for 2023

I want to have 500 email subscribers on my email list.

I didn’t quite hit this goal but I will be working even harder on building my email list in 2024. 


I want to try running ads on social media to help me grow my list.

I didn’t get around to doing this but will in 2024. 


I want to create 150 products on my TPT store - Jackie Partridge Art. 

I created over 100 products in my TPT store and was happy with this given how busy 2023 was! 

I want to create 10 new designs on Society6 - Jackie Partridge.

I haven’t put a focus on Society6 and didn’t create any new designs.


Art Goals for 2023

I want to have 2-5 new art grants this year to fund my artwork. 

I didn’t have time to apply for grants this year. 


I want to have 5-10 art exhibitions this year. 

I had two exhibitions this year and was happy with that. 


I want to set up a new studio in my new house.

I got it set up. I still want to continue to organize it and do little things like make it look pretty. 


I want to make cyanotypes and paper this year. 

I didn’t have time to make cyanotypes this year since my son was born in the spring. 


Social Media Goals for 2023

I want to have over 1000 followers on Instagram on both of my accounts - @jackiepartridge_ and @jackiepartridgeart

I gained over 1000 followers on @jackiepartridgeart and I am still working on growing @jackiepartridge_ .


I want to have over 500 subscribers on YouTube - Jackie Partridge Art 

With my son being born and moving I didn’t put out new videos from July 2023-November 2023. I will be working a bit harder on YouTube in 2024. 

Revenue Goals for 2023

I want to have consistent 3-4 figure months of sales on TPT.

I have had more consistent 3 figure months on TPT this year. 


I want to do 2 art markets and I want to get my artwork into a local shop. 

I did not have time to do either of these. 


Personal Goals for 2023

I want to make healthy food choices. 

I want to go for a walk daily. 

I have done these and feel really good postpartum. 


Family Goals for 2023

I want to go on a hike monthly and enjoy time in nature with my family a couple of times a month. I want to visit with family or friends once a month. I want to plan a family vacation or a couple of small getaways. I want to have a date night once a month when the baby is old enough. 


It has been hard to go hiking or on vacations. We have been seeing family and friends regularly so that has been nice. 


Overall Review of 2023 

As you can see my review of 2023 is not impressive. Did I hit some goals for sure. Did I hit a lot? No. I am still proud of all the life accomplishments we have achieved like buying our first home, moving and having a baby. These are milestones that take a lot of time, energy and patience. I am happy for the mom and wife I am. I am looking forward to hitting my 2024 goals this year. 


Even if you don’t hit your goals - you are not a failure. Sometimes life has better things in store for you! 

Be sure to follow me on social media below by clicking on one of the icons! 

review of 2023


Art Scams to Watch out for

Here are some common art scams to watch out for. Being an artist there are a lot of art scams to watch out for. Some are really realistic but usually if it seems too good to be true it probably is. Below is a list of common art scams to look out for! 

Common Art Scams to Watch Out For: 

Make sure you always trust your gut! If something doesn’t feel right, look right (like lots of spelling and grammar mistakes) then be careful. Be careful giving personal information and credit card or banking information always! 


Artists should be vigilant when it comes to potential scams in the art world. While there are many legitimate opportunities for artists to sell their work and gain recognition, there are also scams and fraudulent schemes to be aware of. Here are some common art scams that artists should watch out for:


  • Fake Art Buyers: Be cautious of individuals claiming to be interested in purchasing your artwork but require you to send them money upfront for shipping, insurance, or other fees. Legitimate buyers typically cover these costs themselves. Also if they want to purchase your art outside of your website it is a red flag. 


  • Art Competition Scams: Some art competitions may require an entry fee and if there are prizes or a juried competition it is normal for fees to apply, but be wary of those with high fees and no reputable judges or organizations behind them. Research the competition thoroughly before participating.


  • Fake Galleries: Scammers may create fake art galleries or online platforms that promise to showcase your work but require upfront fees for representation. Legitimate galleries typically earn a commission from sales, not fees from artists. This can also happen with social media accounts that have high followers which are often fake followers like bots where you need to pay to post to “gain exposure” from a wrong audience. 


  • Unauthorized Print Sales: Ensure that any company or individual selling prints or reproductions of your work has your explicit permission. Unauthorized printing and selling of your art can lead to copyright infringement issues.


  • Phishing Scams: Be cautious of unsolicited emails or messages requesting personal information or payment for supposed art opportunities. Verify the legitimacy of the sender before responding or sharing any information. This also happens in the private messages of your social media. 


  • Overpayment Scams: Scammers may send a counterfeit check or money order for an artwork, claiming it includes extra funds for shipping or other expenses. They then ask you to refund the excess money before the initial payment clears, leaving you with a worthless check. This is why it is best for people to pay for your art securely like through your website or PayPal versus an e-transfer. 


  • Art Authentication Scams: Beware of individuals or companies offering art authentication services for a fee. Seek out established and respected experts for authentication instead.


  • Art Investment Schemes: Avoid art investment opportunities that promise guaranteed returns or excessive profits. These may turn out to be Ponzi schemes or scams.


  • Copyright and Licensing Scams: Watch out for companies that claim to want to license your artwork for various products but require a substantial upfront fee. Legitimate licensing agreements usually involve negotiation and contracts.

  • Fake Giveaway accounts- if you run a giveaway on social media it is very common for a fake account to be created that impersonates your account and messages your followers telling them they have won and to click a link that could give them a virus or take their credit card information for “shipping.”


  • An NFT (Non-Fungible Token) scam targeting artists typically involves fraudulent schemes or deceptive practices related to the creation, sale, or representation of NFTs based on an artist's work. Here are some common NFT scams artists should be aware of:

  • Unauthorized Minting: Scammers may create NFTs of an artist's work without their permission. They essentially steal the digital art and tokenize it, profiting from sales without the artist's knowledge or consent.

  • Impersonation: Some fraudsters might impersonate artists on NFT marketplaces, claiming to sell NFTs of their work. Unsuspecting buyers may pay for what they believe is authentic art but receive nothing in


  • Lastly people through social media often will try to convince you as an artist to purchase an NFT to protect your work. You don’t need that there are already copyright laws in place.  Digital Art: NFTs are primarily associated with digital art, as they provide a way to prove ownership and authenticity in the digital realm. If you create digital art, NFTs can be a valuable tool for protecting your work and potentially monetizing it.

To protect yourself from art scams, it's essential to conduct thorough research, ask for references, and consult with trusted peers or industry professionals when in doubt. Trust your instincts and be cautious when dealing with unfamiliar parties or offers that seem too good to be true.

Follow me on social media by clicking on one of the icons below! 


How Do I Promote my Art?


How do I promote my art? As an artist it is very important to not only make art but to promote it. Otherwise people will not know that you have art to offer. To learn how do I promote my art, keep reading! 


7 Ways for How Do I Promote my Art 

Here are 7 ways to help you answer - How do I promote my art?


Pinterest 

Pinterest isn’t just social media, it is a search engine. Pinterest is actually the number one way I drive traffic to my website. I have pins that are three years old and are still getting lots of views and clicks to my website. Pinterest helps people to sign up to mailing list and to purchase art from me. 


Social Media -Instagram, Facebook and TikTok

Social media is important in growing your audience, but it is not a place I actively spend a lot of time to promote my art. I use social media as a way to connect with my audience and to encourage people to sign up for my mailing list. 80% of the time I post about me, about inspiration or about the process or other free content I have like painting tips and tutorials. The other 20% and sometimes less I will directly tell people that I sell things and they should buy them. 


Email List 

I send emails to my list consistently and this is where I then share helpful tips like on social media but I share what I sell and promote my art occasionally like when I offer a sale or I have new art collections. 


You can join my mailing list below by filling out the the form to see how I promote my art first hand you can join my mailing list by filling out your information below to save 15% off artwork. 


Content -Blogs + YouTube

In blog posts and YouTube videos I share helpful content most of the time but I am able to link to art or art teaching resources that I sell. Sometimes I will create a blog post or a video specifically on something I sell. 


SEO

SEO stands for search engine optimization and it basically means that when someone is searching for something on Google, they can type in a keyword and websites appear. By adding keywords and content your website can be found easier. Having a website appear at the top of someone’s search results means that more people will click on your website and potentially purchase the art you are selling. 


Selling on Multiple Platforms 

If you only sell on your website or one place you have less chances of being found and making a sale. Whereas if you sell on different platforms like a website, Etsy, Amazon etc. there are more people or a specific audience of people that are visiting certain websites. Therefore you have more chances of being found and a wider audience of people who can connect to your work and see the art you are promoting.


In Person Events 

In person events like markets or exhibitions are a great way for people to get to know you and your art. You can leave business cards or encourage people to sign up for your mailing list. I have had lots of people purchase from me after an event because they took a business card and remember meeting me in person and seeing my art at an event. 


Art Promotion Tips

  • Be careful with paid opportunities to promote your artwork there are a lot of scams

  • You don’t need to pay for promotion wait until you are making significant money before spending money on ads or promoting a post on social media


Those are 7 simple ways to help you with the question of how do I promote my art?


Click the button below to check out my art shop! 


How to Be an Artist


Learn how to be an artist. It is a lot simpler than you might think. Being an artist is fun to be able to make your own art and make money off your art but there are some business and administrative tasks involved. Keep reading, to learn more about how to be an artist.


How to Be an Artist 

Make art and sell it. I wish it were that simple but it doesn’t need to be overly complicated. Often artists, including myself, get caught up with the never ending to-do list and forget to focus on the basics of making art and selling it. The number one focus for artists should be to make art and to sell art. 


Make Art

No famous artist made a masterpiece the first time they made art. It takes time and practice like any new skill. It also takes awhile to define what you want to make art about. What do you want to be known for? What art do you like making? In order to answer those questions you have to make a lot of art and focus on that daily if not weekly. 

Market Art/Sell Art  

When you aren’t making art it is important to share about your art while growing a community of fans. Build your social media platforms by posting consistently, grow your email list by offering a freebie or discount like free shipping on artwork and share about what you are making. 


It’s important to share about your art and process 80% of the time and then sell to your audience for the other 20%. 


Decide where you want to sell your art. Start small and simple first. You can sell on your website, Etsy, Amazon or a print on demand website like Society6. You can also try selling at local art markets. 

Once you have established an email list, one social media platform and making and selling art you can begin to add other elements to extend your business as an artist. Here are some ideas below:


How to Be an Artist - Ideas 

  • Affiliate marketing 

  • YouTube or Podcast

  • A blog 

  • Selling art on another platform

  • Adding another social media platform 

  • Apply to artist awards/grants 

  • Apply to artist residencies 

  • Apply to art exhibitions

  • Reach out to stores to pitch your artwork 

  • Teach a course or a workshop on an art technique you use

want to be an artist

Connect with me on social media by clicking on one of the icons below! Best of luck with your journey to becoming an artist! 

how to be an artist


How to Use a Sketchbook


Learn how to use a sketchbook and the various purposes of a sketchbook in this post. There are many ways to use a sketchbook and I want to share how I use a sketchbook as an artist. To learn how to use a sketchbook, keep reading! 


How to Use a Sketchbook

There are a number of ways to use a sketchbook. A sketchbook can hold many different purposes for an artist. Here are some of the ways a sketchbook can be used below! 


As a Journal 

You can use a sketchbook as a journal by recording ideas, notes, thoughts, plans etc. This is often how I use a sketchbook in my art practice so that I don’t forget ideas. 


As a Logbook

You can record dates and times you worked on a project to keep track of the hours you worked. You can treat your sketchbook as a scientist and record findings of what worked, what didn’t work and what you want to try next time. For example, you can keep track of colours of paint and ratios you used to mix a specific colour of paint for a painting. You could also record how long something took to dry or about an installation that didn’t go well and what you might do differently next time.  


As a Place to Brainstorm

You can use your sketchbook as a place to brainstorm ideas by making lists or mind maps to come up with ideas of what to create, what materials to use or what the title of an artwork should be. I often use my sketchbook in this way. 


As a Place to Plan

I will also use my sketchbook to create small thumbnail rough sketches of ideas for a final piece or how a project might be displayed. Often I will plan out a couple of ideas to see what I prefer in case something doesn’t turn out as planned. 


As a Place to Experiment 

You can use the pages of your sketchbook as a place to experiment and test out new ideas, materials or techniques. You could even label or record your different tests, so you remember what you did in the future. 


As a Place to Practice 

You can use it to practice drawing, composition, ideas, installation plans etc. 


A Place for Sketching/Drawing 

You can use it to practice sketching or drawing by drawing daily. You can carry your sketchbook with you in a bag to sketch what you see while you are waiting in a doctor’s office or waiting for the bus. You can draw what you see outside when you stop in the park during a walk. Or you can follow drawing prompts to help keep yourself inspired while practicing your drawing. 


A Place for Painting or Mixed Media 

Just like how you practice drawing or sketching you can practice painting or mixed media. There are sketchbooks you can buy specifically for painting or mixed media that have thicker paper and are able to hold paint or liquids without warping or wrecking the paper. 


As a Place for Research

You can record research, notes, inspiration, artists and artwork you admire etc. If your artwork is on a specific theme you might want to research that topic to inspire other ideas or to plan the title of the artwork.


These are some of the ways to use a sketchbook. As you can see you might choose multiple ways for how to use a sketchbook. There is no right or wrong way, you get to decide! 


Ways to Use Your Sketchbook More

To keep you inspired and use your sketchbook more, try to keep it in a place where you can see it daily or have multiple sketchbooks like one by your bed, one in the studio and one in your bag. 


You can also try my drawing prompts to keep you inspired and to practice your drawing skills. Click here to check them out! 


Related Articles:

How to Use Layers in a Sketchbook

Drawing Prompts for High School 

Art Journal Inspiration

How to Make Time for Art

Click here to download my FREE guide with 10 tips for creating your art portfolio for school applications!


Where to Find Art Inspiration

Where to find art inspiration? It’s not a hard question because inspiration can literally be anything that captures your eye and sparks an idea. Art inspiration is all around, looking to be found. Keep reading to discover where to find art inspiration. 


Where to Find Art Inspiration


Here is a list of places and ideas that might help you in finding art inspiration. You can also read about how to find inspiration here!

  • Go for a walk

  • Go on a hike 

  • Walk by the water 

  • Drive somewhere new 

  • Travel somewhere 

  • Go on a walk and see where it takes you don’t plan a destination

  • Go through an art supply store and see what you are gravitated towards

  • Watch a different type of video or listen to a different type of music than you normally wouldn’t watch or listen to

  • Walk in a local farmer’s market to be inspired by new scents and new food 

  • Read a different type of book or magazine 

  • Take a look at a garden centre or nursery 

  • Take a walk through a forest 

  • Take time to meditate or day dream and see what you think of 

  • Set a timer and begin writing non-stop for 20 minutes to see what you write about

  • Go to a thrift store and see where you are gravitated to

  • Read some poetry 

  • Spend some time gardening 

  • Go to the beach 

  • Learn a new skill or technique on YouTube

  • Explore on Pinterest - you can follow me here 


Trying something new and outside of your comfort zone or routine can help you see a new experience and gain inspiration. It is important to keep an open mind and allow yourself to be present in the moment so that you can really experience art inspiration when it comes to you. 


Click here to download my FREE guide with 10 tips for creating your art portfolio for school applications!

Be sure to let me know where you found inspiration. Click on one of the icons below to connect with me on social media. 

where to find art inspiration


What Does Canva Pro Do?

What does Canva Pro do? What are some of the benefits of Canva Pro versus the free-trial? There is a lot that Canva Pro can do. If you want to learn more about what does Canva Pro do, keep reading.


What Does Canva Pro Do?

what does canva pro do


Canva Pro Benefits 

  • Has more storage of designs 

  • Has more design elements to choose from

  • Able to organize in unlimited folders

  • More design templates to choose from

  • Able to add brand colours and logos easily

  • Resize designs 

  • Background remover in photos

  • Social media scheduler

  • More customer support 


What I Use Canva Pro For as an Artist

Here are some of the ways I use Canva Pro as an artist most commonly in my business:

  • Make Pinterest pins

  • Social media posts for sales 

  • Email freebies 

  • Facebook posts 

  • YouTube covers 

  • Digital products to sell

  • List of art materials for workshops 

  • Graphics for ads

  • Certificates of authenticity for artwork

  • Staging artwork in photographs 


What I Like About Canva Pro as an Artist

The following are Canva Pro features that I use most frequently in my Canva designs as an artist.


Organization with Unlimited Folders

Once you begin to use Canva Pro you will begin to see all the uses you can use it for. It is handy to be able to organize your designs in different categories like a folder just for Instagram posts, so that you can easily find your designs. 


Background Remover 

I like the feature of the background remover. You can literally press one button and it will remove the background. This can be handy to make your designs look more interesting and professional! 


Brand Colours and Logo

With the brand kit feature you can easily add in your logo on your designs and change colours in a template or a design with just one click. By setting up your brand colours you will have a consistent and professional look to all the designs you create! 

Resizing Designs

If you create an instagram post design you can click the resize button and easily size it to a Facebook post, Instagram story post etc. 


As you can see Canva Pro has a lot of great perks for a very affordable price. To try Canva Pro for free for 30 days you can click on the button below.

what does canva pro do